Tile Mounting Guide
Choose Your Mounting Method
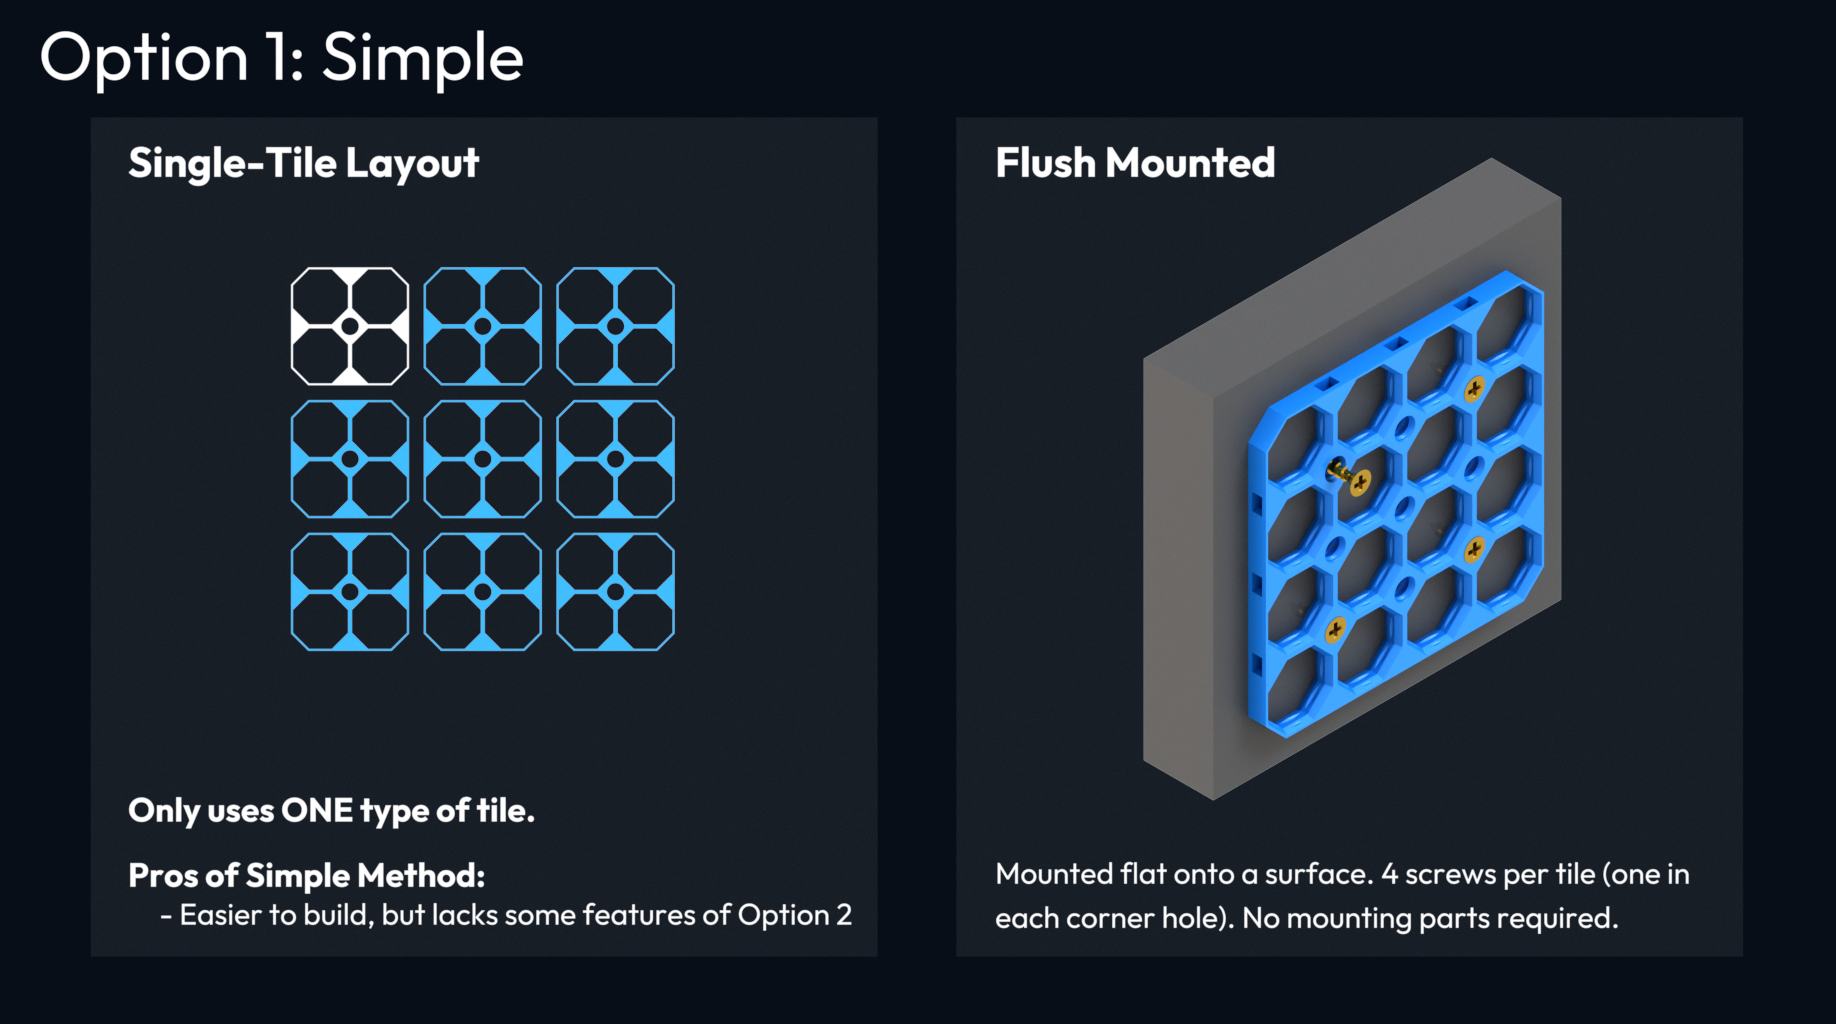
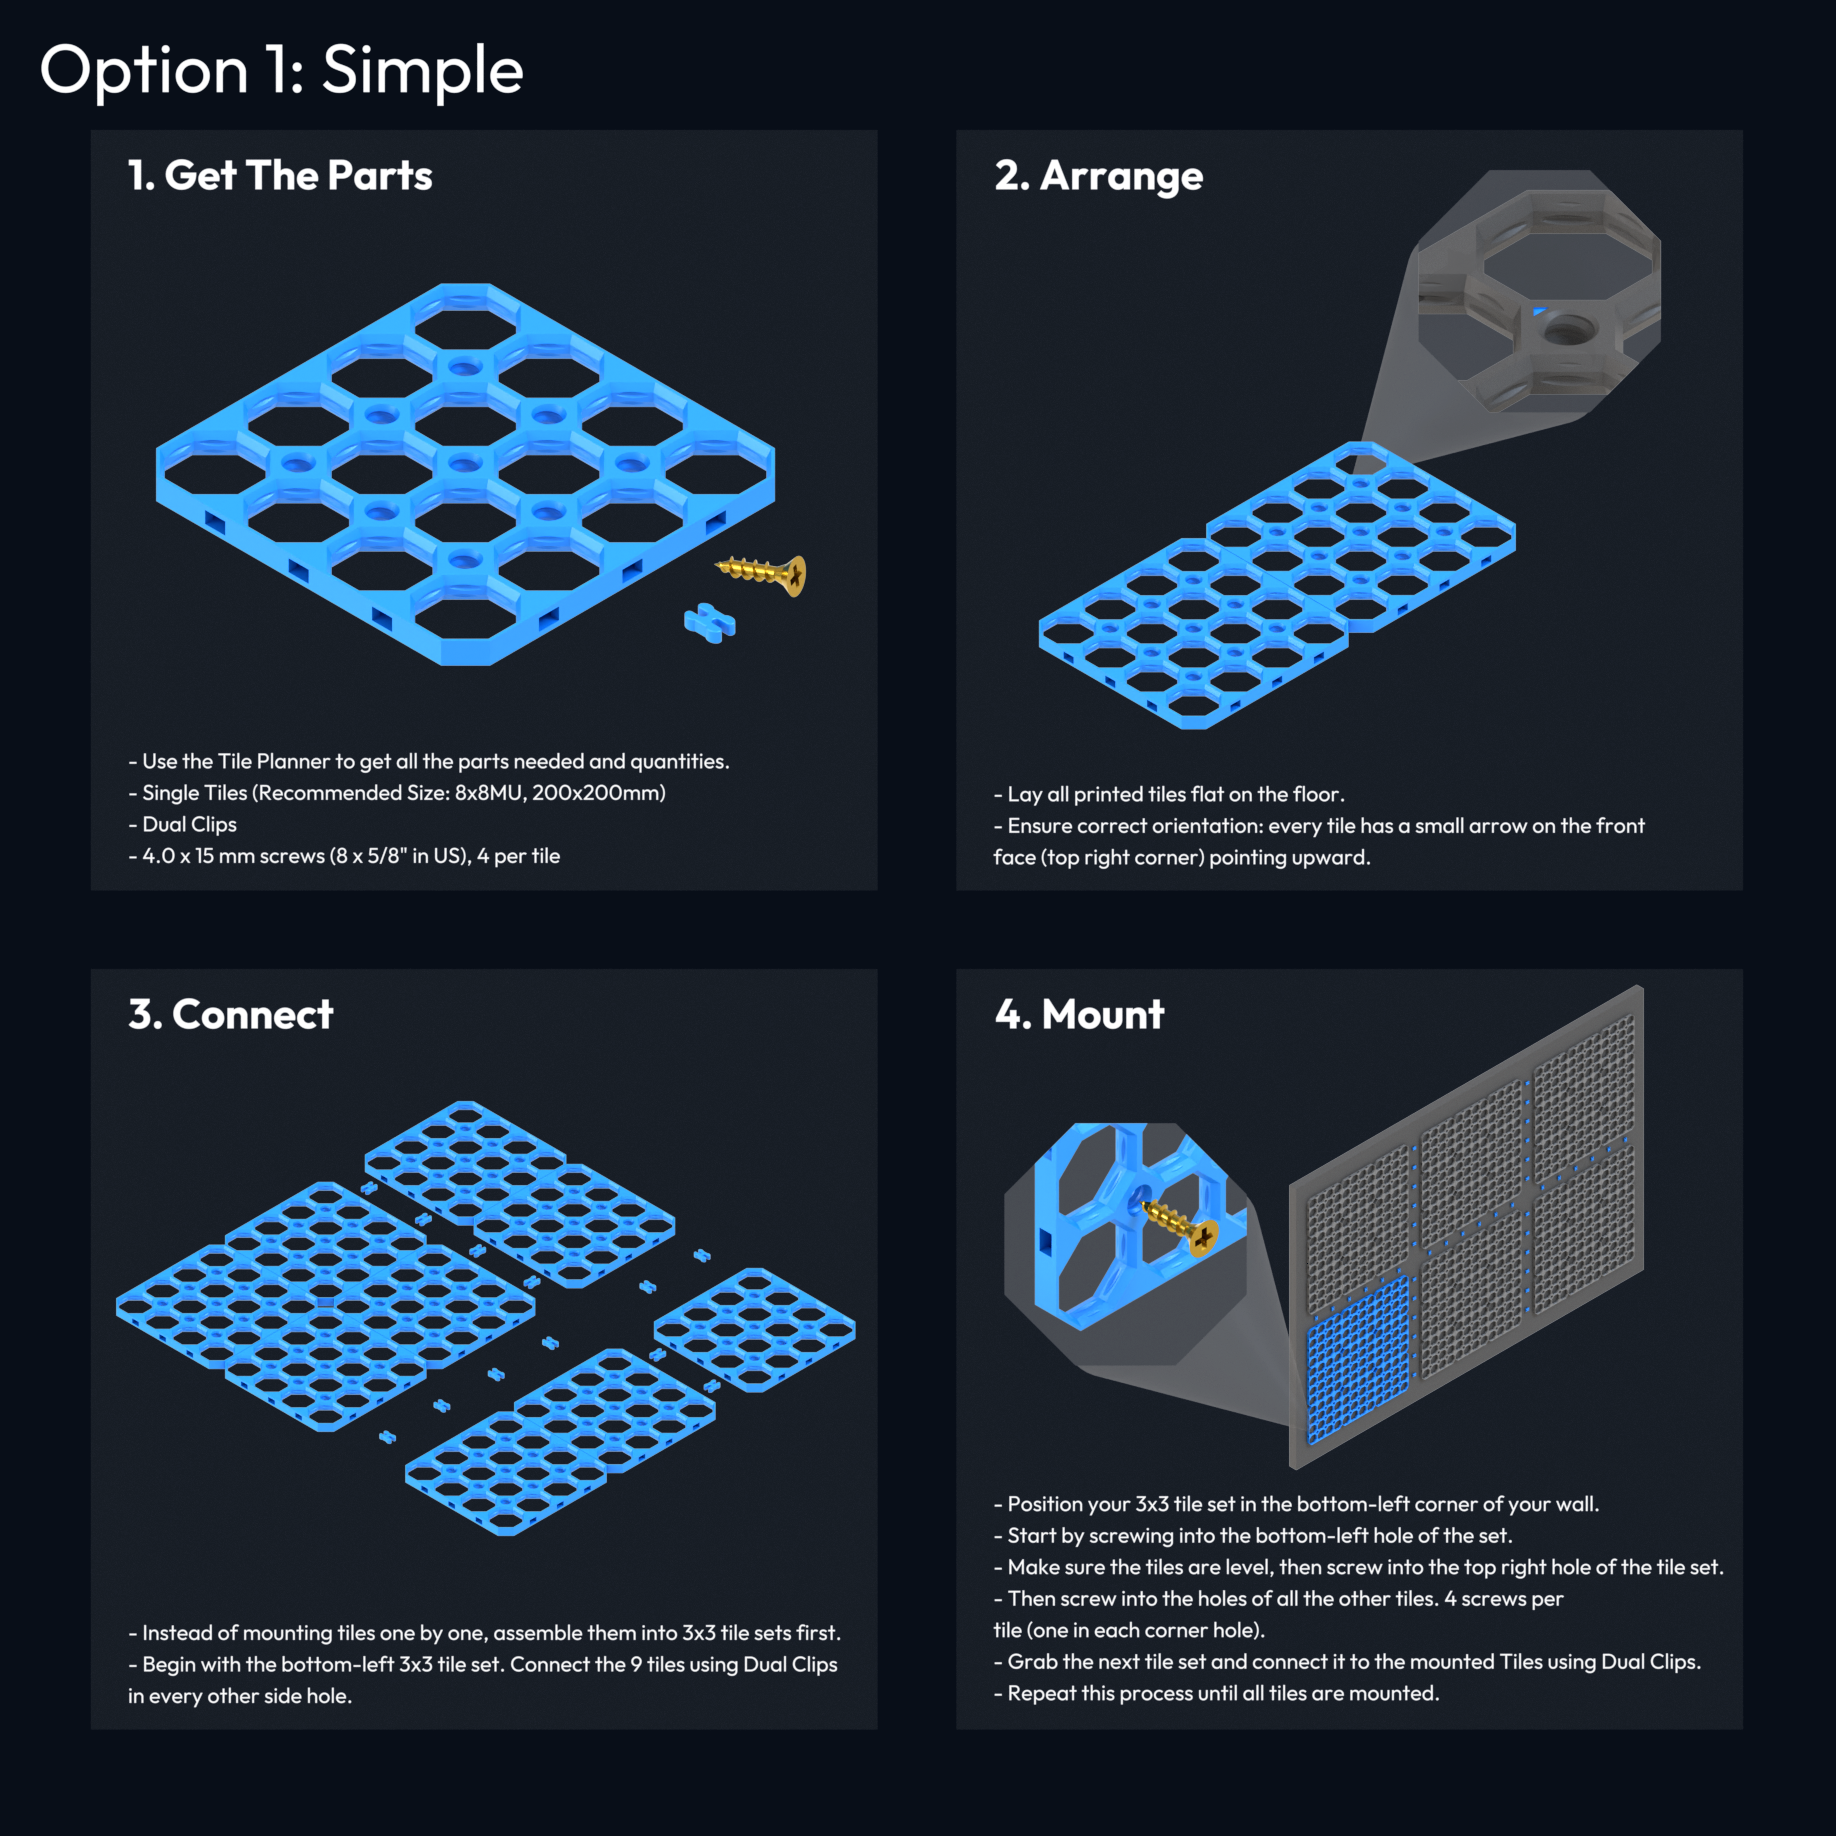
Option 1: Simple
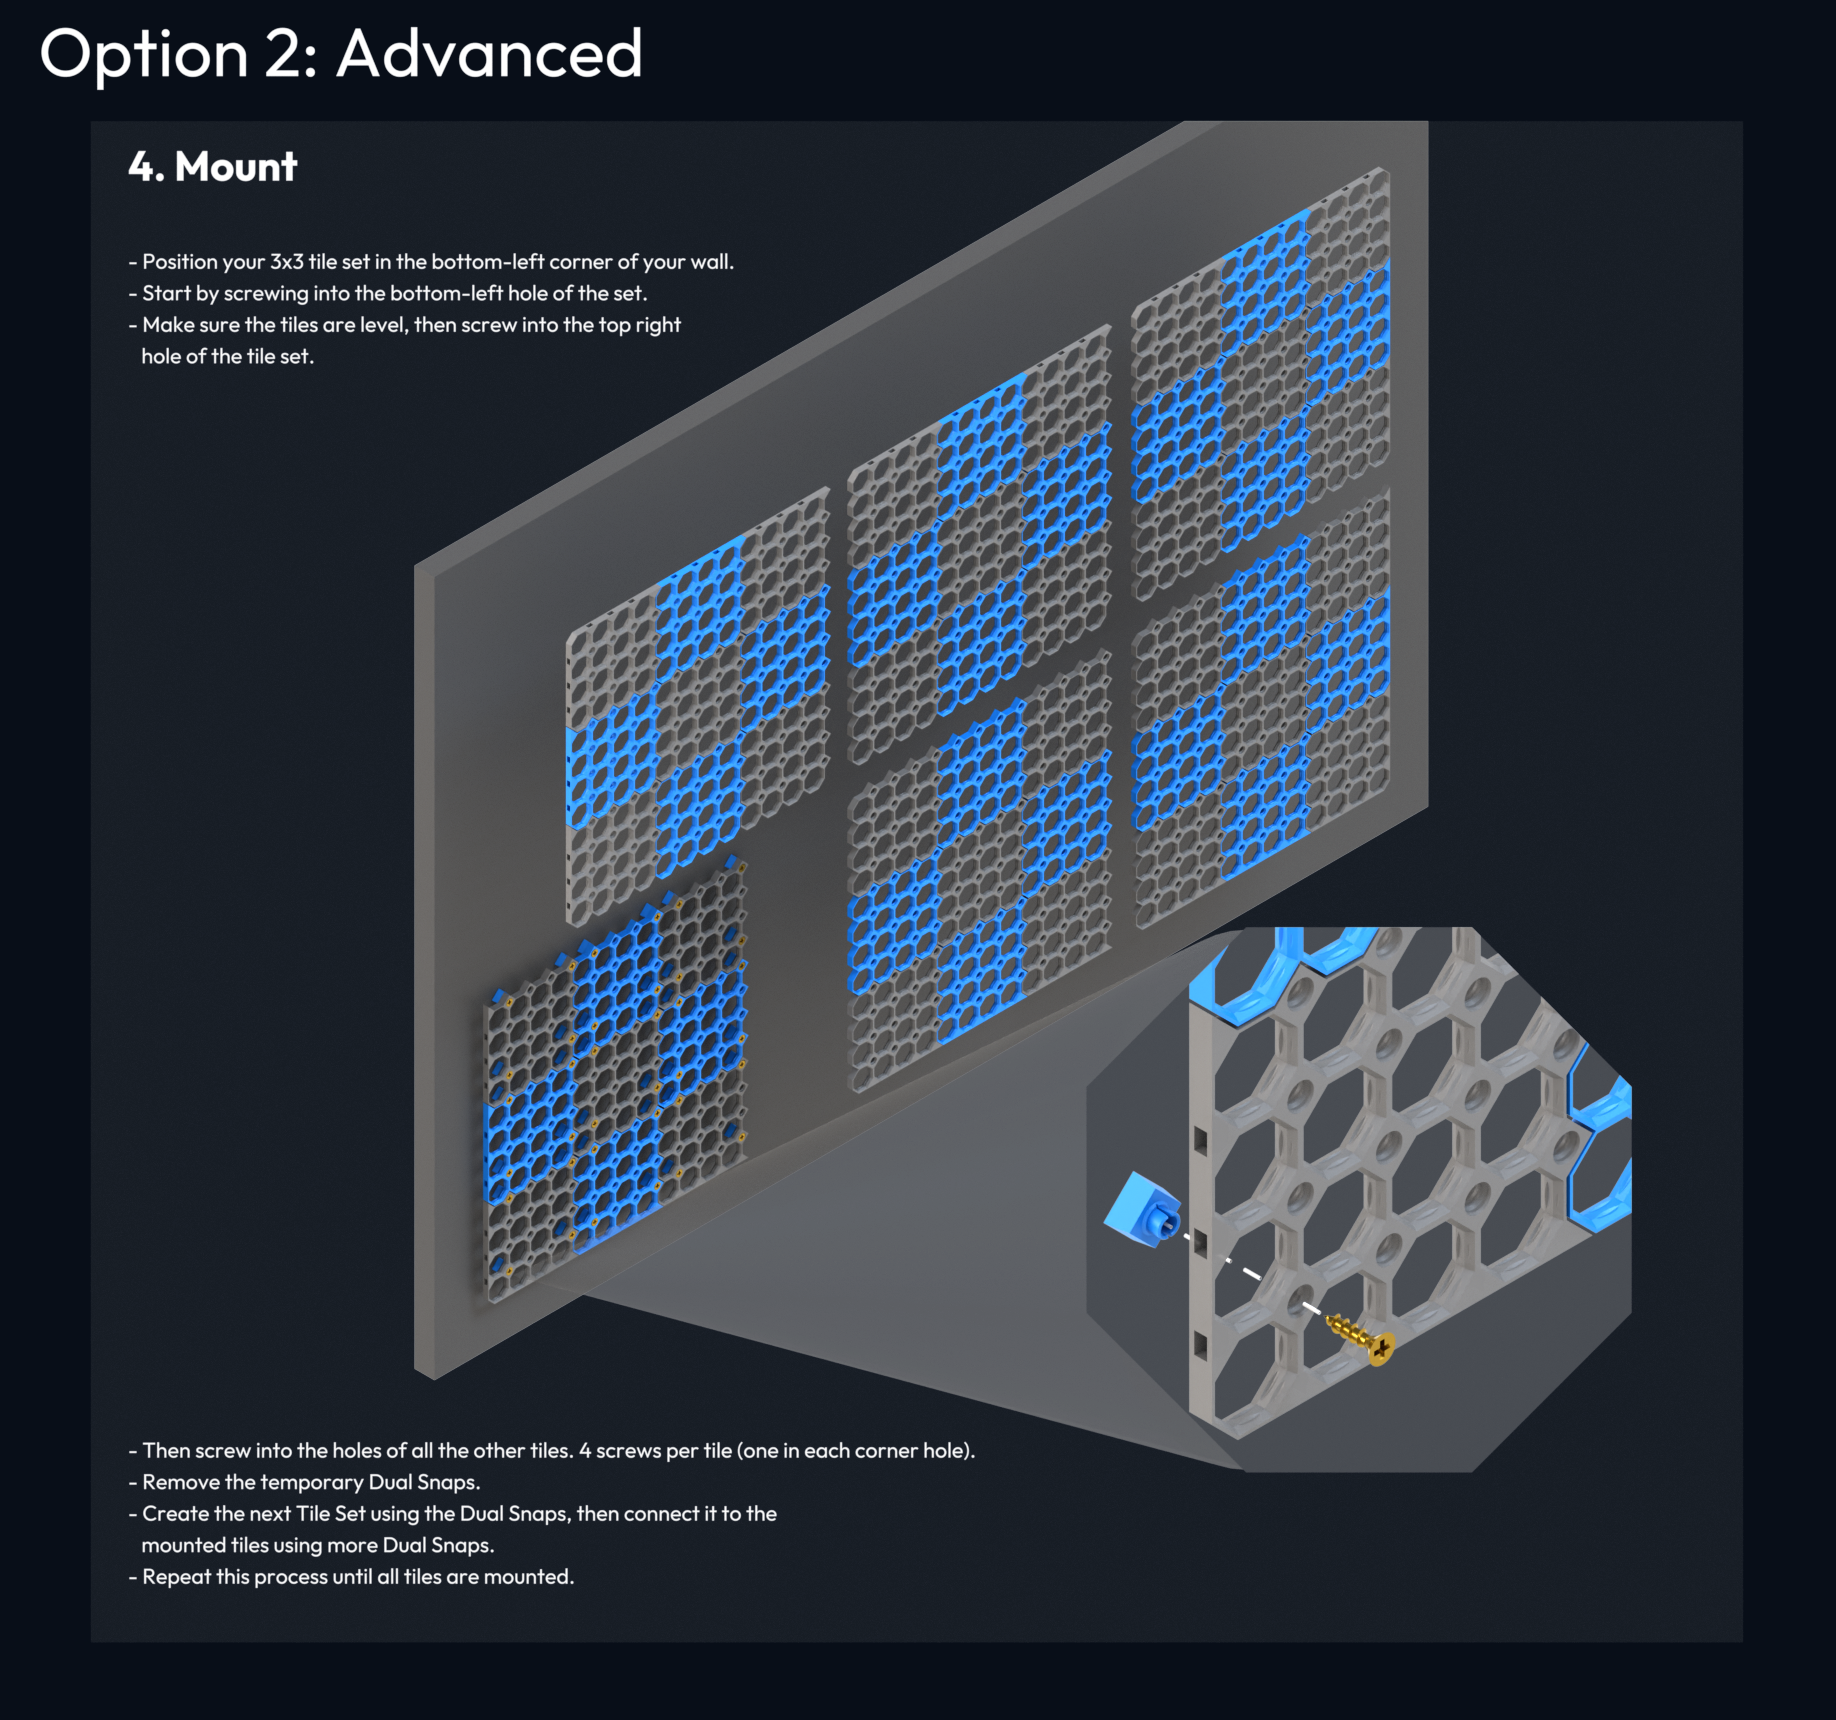
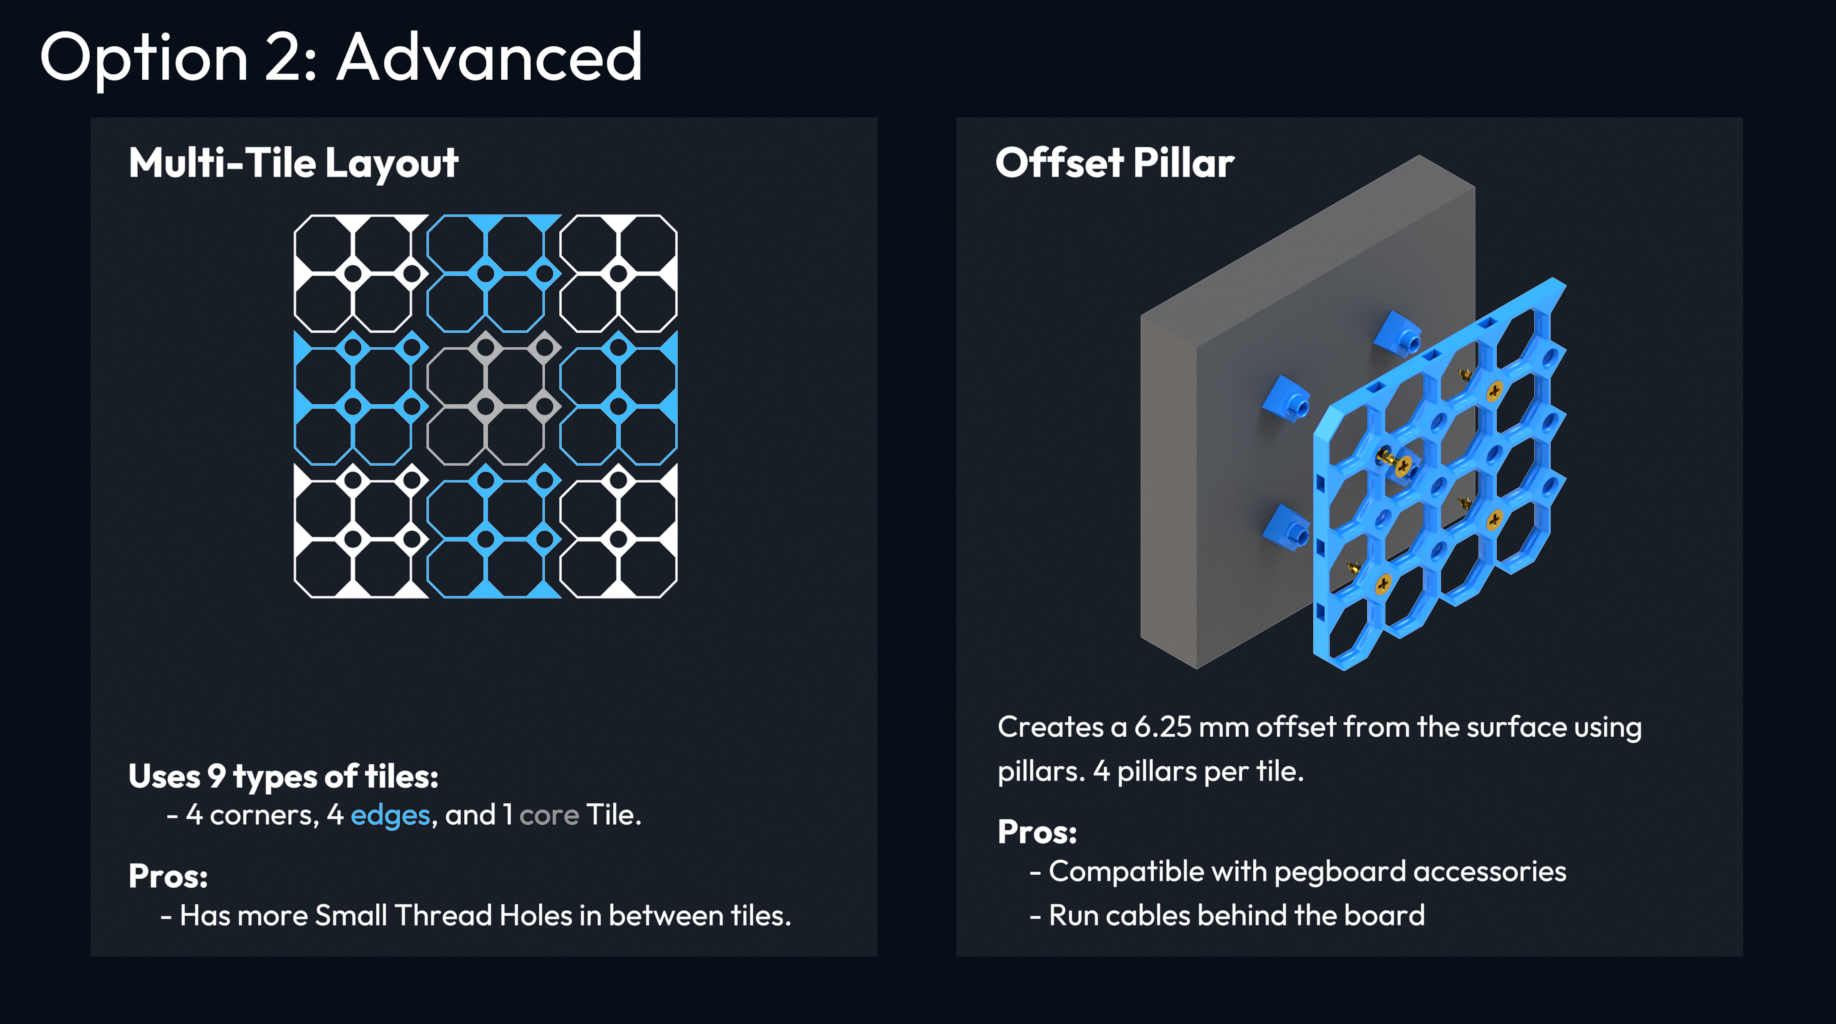
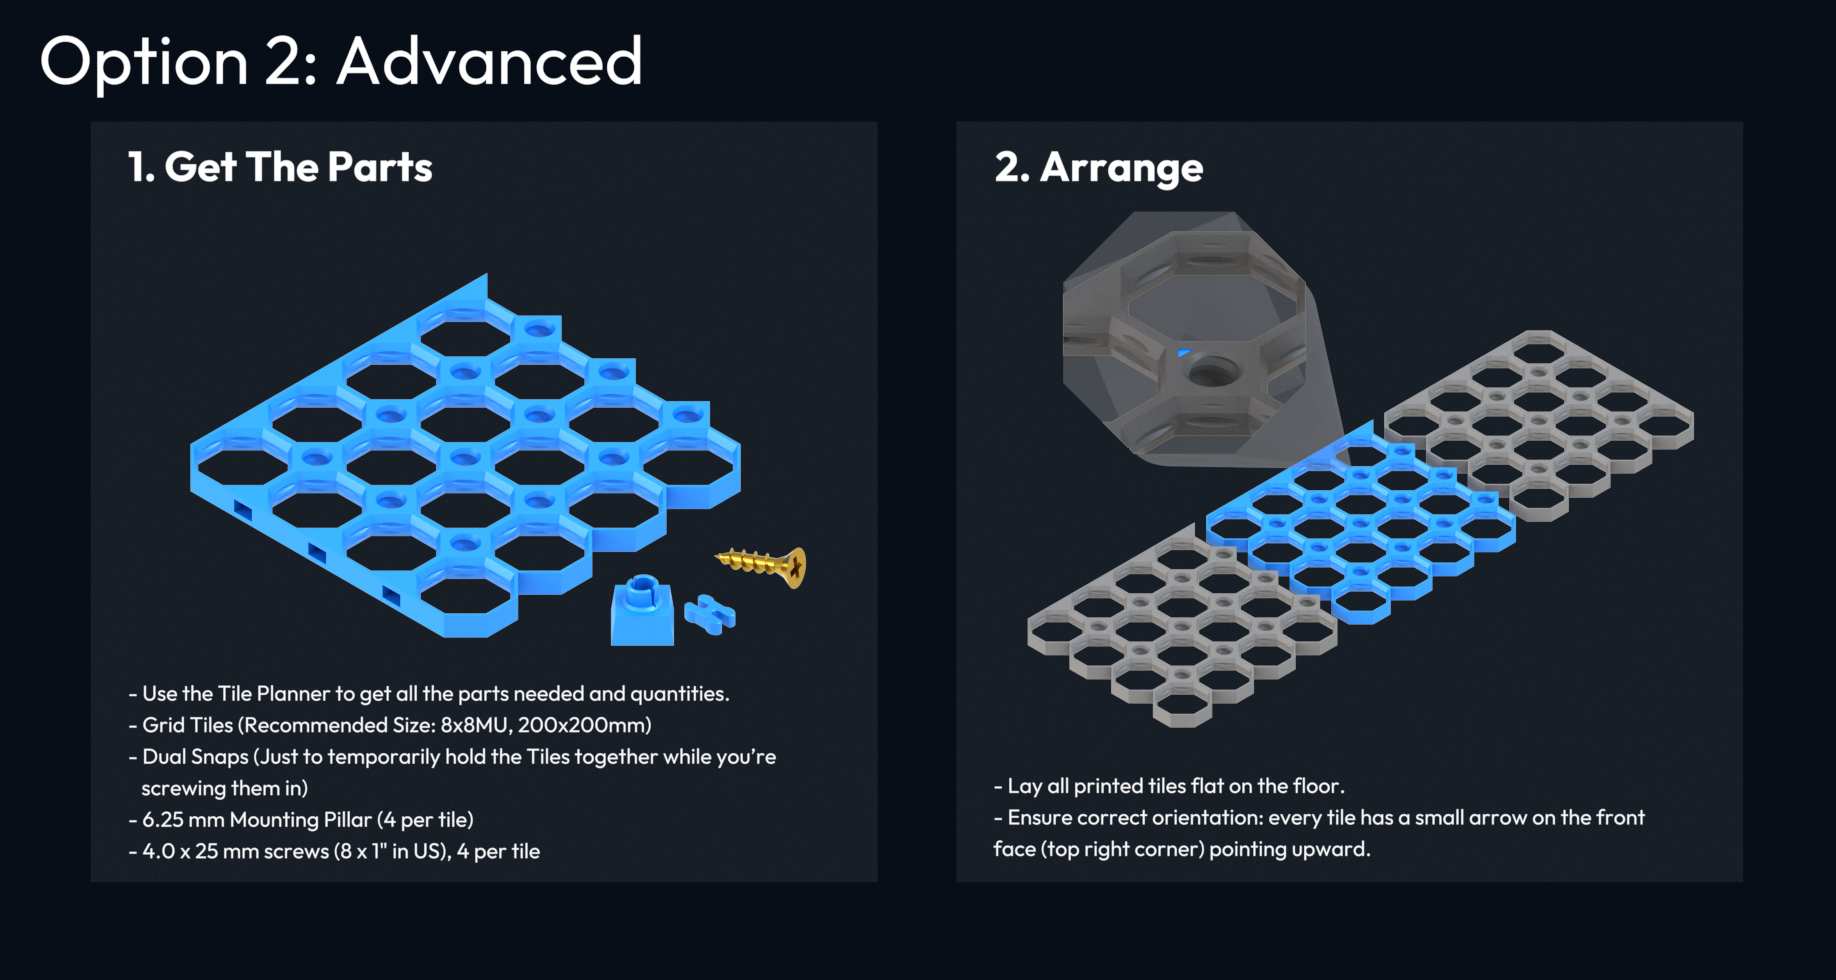
Option 2: Advanced
Other Mounting Options
We recommend the options above. However, if you have a special setup, additional mounting choices are available:
If you are looking for a renter friendly option (no holes in your wall), we recommend the adhesive mounts. There is also a free-standing option, or installation on a cleat or pole. You can also adjust the distance from the surface or opt for removable tiles. Explore all the possibilities in the Advanced Knowledge Hub.
Installation Steps
Optional Step: Mounting an MDF Backing Board
To avoid drilling a lot of holes on your wall, you can first mount an MDF board and then attach your Multiboard to it.
- Use 12 mm thick MDF (or 18 mm for heavier loads).
- Secure the board with 40–60 mm screws.
- Space out the screws by 30–40 cm.
Option 1: Simple
Option 2: Advanced
- Connect (image coming soon)
- Instead of mounting tiles one by one, assemble them into 3x3 tile sets first.
- Begin with the bottom-left 3x3 tile set. Temporarily connect the 9 Tiles together using Dual Snaps.
- Insert Offset Pillars into the back of the tiles — 4 per tile (one in each corner hole).